Jun, 2015
SSO Integration
Table of Contents
As a convenience, SSO (Single Sign-on) allows commenters (or any user for that matter) to login with a popular social network account; e.g. Twitter, Facebook, Google, LinkedIn. This feature is highly recommended, but disabled by default; since it requires some work on your part to set things up properly. No worries though, we will walk you through the entire process in this article.
In a hurry? Jump to:
Overview of Single Sign-on (SSO)
When a visitor logs in through an SSO service provider, an account is automatically created for them in WordPress (if one does not exist already). These auto-generated WordPress accounts are created using details obtained from an SSO service provider. Such as first name, last name, email address. SSO users receive a default Role; i.e. whatever the default Role is for your site. Normally the Subscriber Role, but you can change this from your WP General Settings on standard WP installs. WP Multisite Network installs always use the Subscriber Role.
An account created in this way (via SSO) could be accessed like any other WP account, but it will also be connected to the underlying SSO service too. Meaning, a user may simply log into your site in the future w/ the SSO. They won't ever need a username/password that is specific to your site.
If somebody logs in with Twitter, Facebook, Google, LinkedIn, etc.; are they associated with a username/password on my site too? If so, how would they log in with those credentials?
When somebody logs in via Twitter, Facebook, Google, LinkedIn, etc.; there is no need to ask the user for a username/password. Authentication occurs through the SSO provider, so this is not necessary. That said, the answer to this question is yes. There is also a generic username/password that is site-specific, which sits quietly behind-the-scenes. It serves no useful purpose though, unless you come up with one on your own.
To clarify, when Comment Mail™ auto-generates a WP account for them, they will be assigned a generic username/password that they could log in with via /wp-login.php if you wanted them to. Auto-generated usernames/passwords are not very friendly though, and they are not given to the user; as this is not necessary. However, if you choose to look-up their account in your Dashboard (search by name or email address), you could obtain the generic username and reset their generic password yourself; for the purpose of relaying that information to an end-user that wants it. But, again, this is not necessary. The end-user can just continue to log into your site with the SSO service they originally created their account with. They have a generic username/password that is site-specific, but they don't really need it, since they are logging into the site through an SSO provider; i.e. Twitter, Facebook, Google LinkedIn, etc.
SSO Services (oAuth App Keys/Secrets)
This can be the most time-consuming portion of the integration. Please be patient. Plan to spend at least 30 minutes (perhaps even a couple hours) setting all of these up and tuning things in.
In this article I will cover:
First, A Quick Overview...
All of these major services provide an oAuth API which is a common thread that Comment Mail™ works with. However, while each of the services is very much the same, they also differ from each other in subtle ways. For this reason, we suggest that you approach your integration one SSO service at a time. The next sections of this article will approach things in the same way.
Let's get started by integrating with Twitter!
Twitter SSO Integration
Step 1. Visit the Twitter Application Center
See: <https://apps.twitter.com/>; sign-in or create a new account.
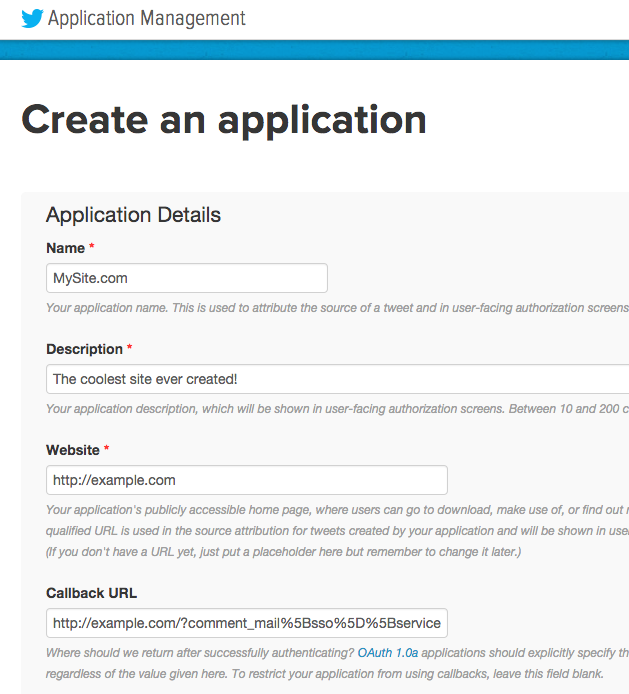
Step 2. Create Twitter Web App
Click here to create a new Web App
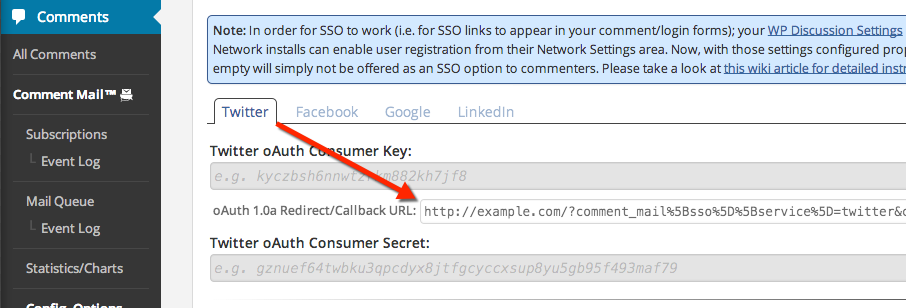
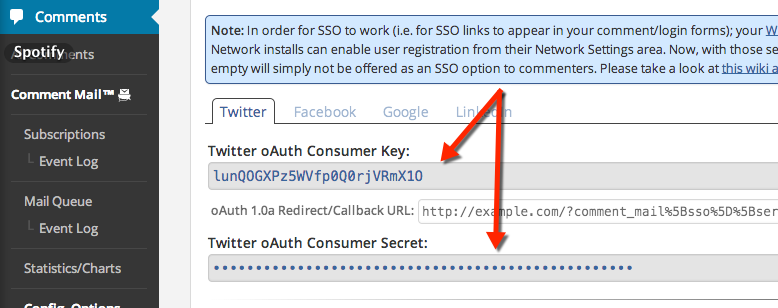
You can put whatever you like for each field, but when it asks for your Callback URL, please use the URL provided by Comment Mail™ in your Dashboard. Comment Mail™ also defines this automatically at runtime, but it's good to configure it properly on the Twitter side too.
Here are a couple of screenshots to show you an example Twitter App.
Step 3. Configure App Settings
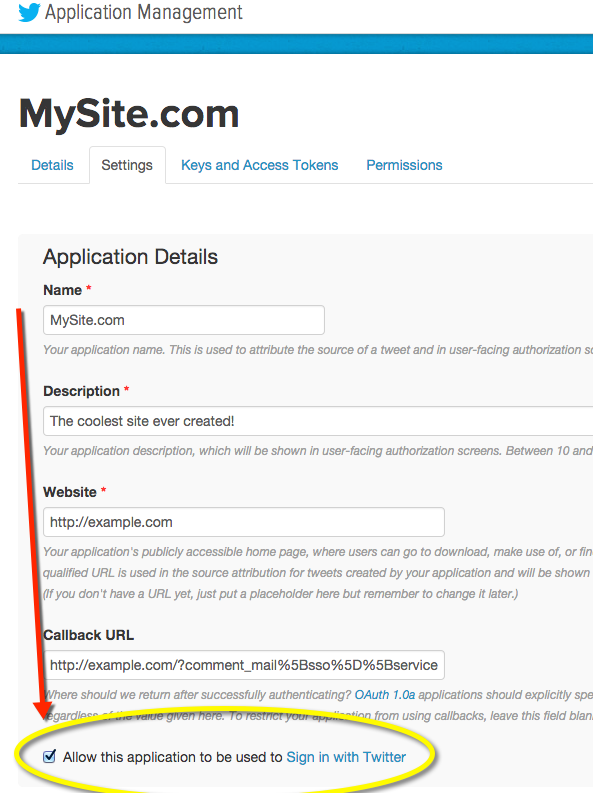
Once the App has been created, find the "Settings" tab for your new Twitter App, and pull up the current list of details that you just entered. Here you will find an additional config. option that was not available during initial App creation. This box MUST be checked to allow SSO to work w/ Twitter.
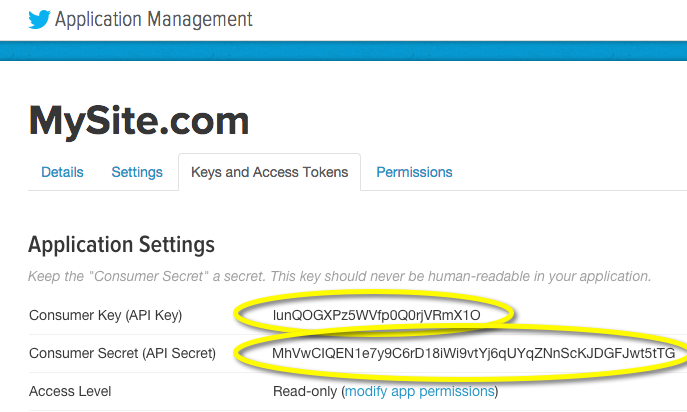
Step 4. Obtain oAuth Key/Secret
The last step is to obtain your oAuth Key/Secret for the Twitter App, and give those details to your installation of Comment Mail™. Here are a couple of screenshots to help you with this part.
Facebook SSO Integration
Step 1. Visit the Facebook Developer Center
See: <https://developers.facebook.com/>; sign-in or create a new account.
Step 2. Create a New Web App
Click here to create a new Web App
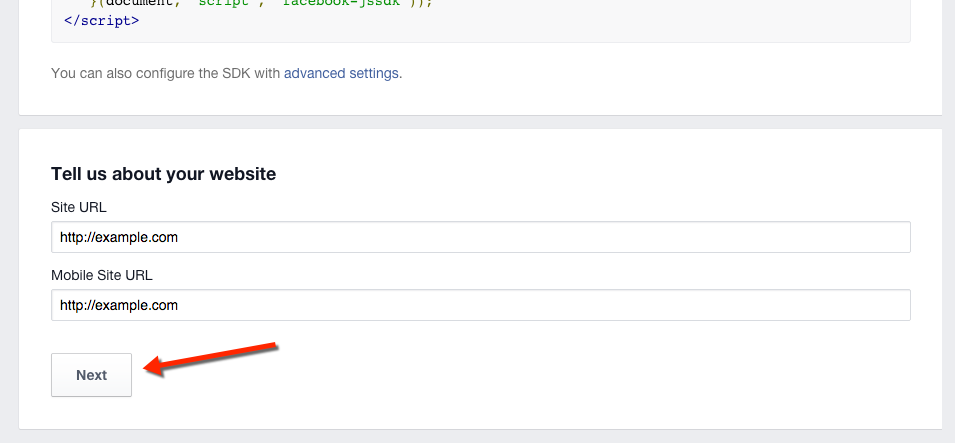
Facebook simply asks for some basics initially, you can put whatever you like. Once your new Facebook App has been created, fill in your website URL, and mobile URL. Normally the same thing. Then click "Next".
Step 3. Move Ahead to Configure Web App
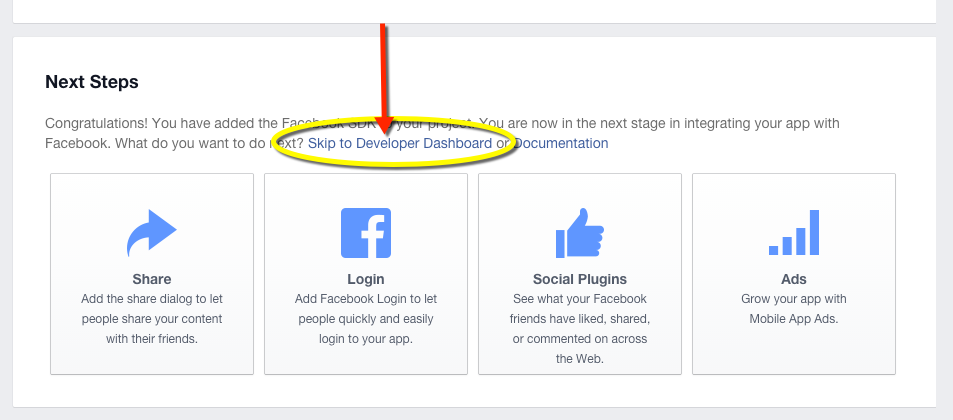
It is tempting to click the "Login" option here, but please skip straight to the Developer Dashboard instead, as the integration between Comment Mail™ and Facebook has already been done by us. All we need is just to edit the App a bit, and obtain the Key/Secret for Comment Mail™ to use.
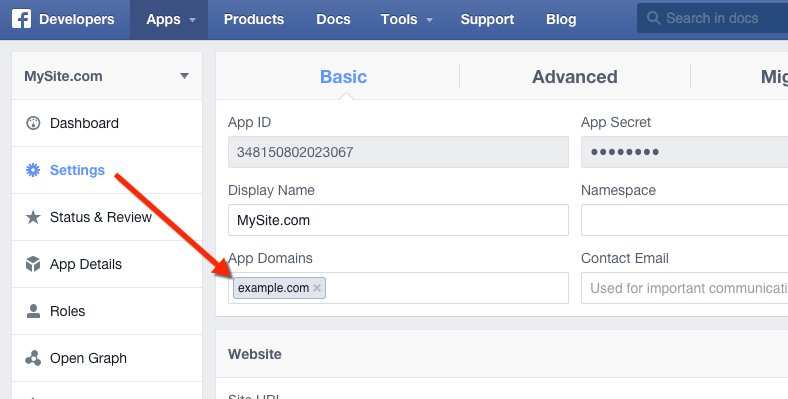
Step 4. Add List of Approved Domains
Here you should add the domain of the WordPress installation where Comment Mail™ is running; i.e. the domain name for your site.
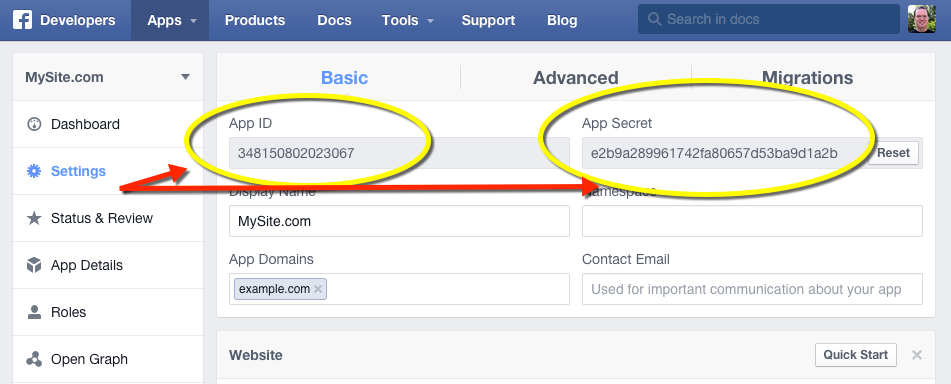
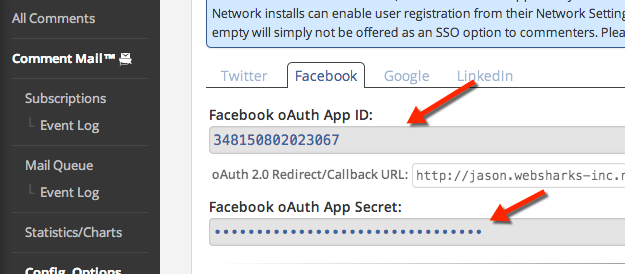
Step 5. Obtain oAuth Key/Secret
The last step is to obtain your oAuth Key/Secret for the Facebook App, and give those details to your installation of Comment Mail™. Here are a couple of screenshots to help you with this part.
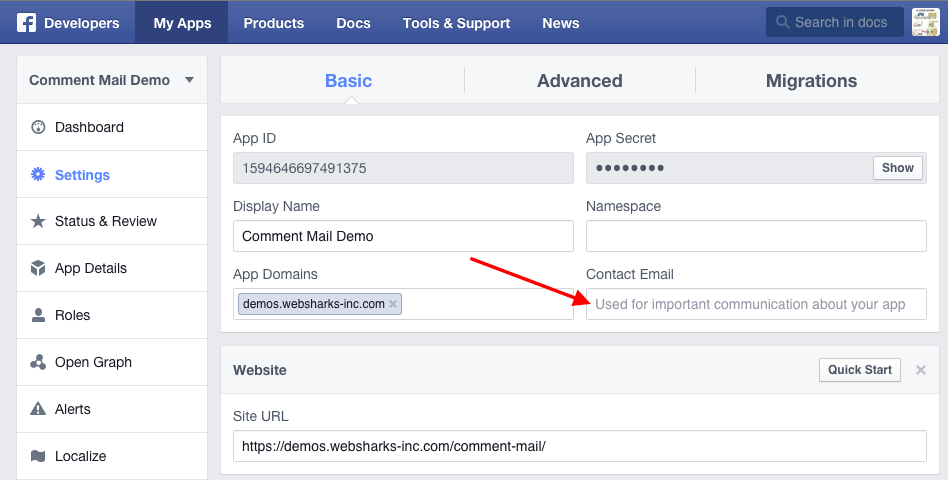
Step 6. Add Contact Email
You will need to add a contact email for the Facebook App you just created. Select "Settings" in the left sidebar and provide a valid contact email address.
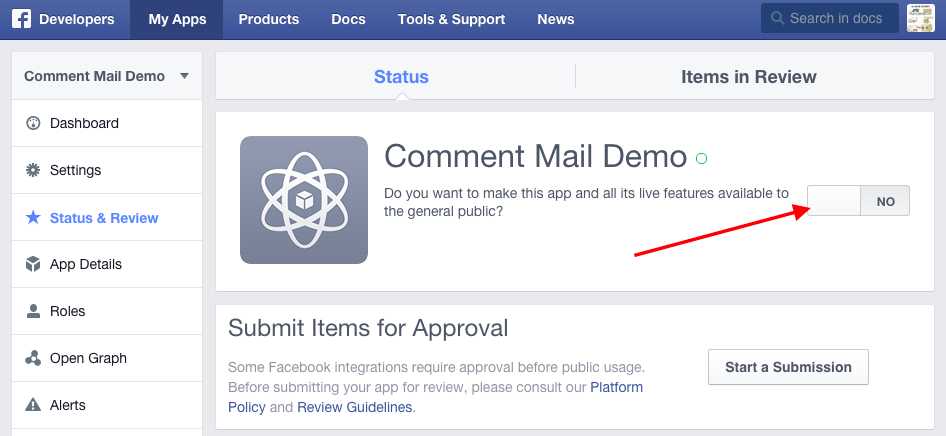
Step 7. Put App in Live Mode
Once your Facebook App is configured, you are ready for it to be publicly available. Select "Status & Reviews" in the left sidebar and click "Yes" to enable your app and all of its live features.
Google SSO Integration
Step 1. Visit the Google Developer Console
See <https://console.developers.google.com>; sign-in or create a new account.
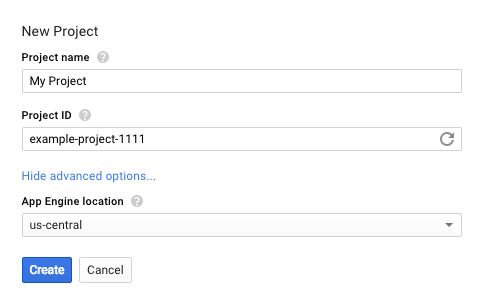
Step 2. Create a New Project
Once you're logged-in, click the "Create Project" button.

Google just asks for some basics. You can enter whatever you like. When you're done, click the "Create" button and wait for your new Web App to show up in the list on this page, or for the Project Dashboard page to open automatically.
Step 3. Configure the App (i.e., Project)
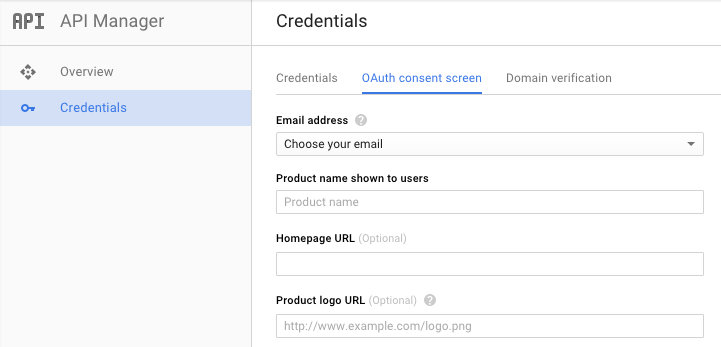
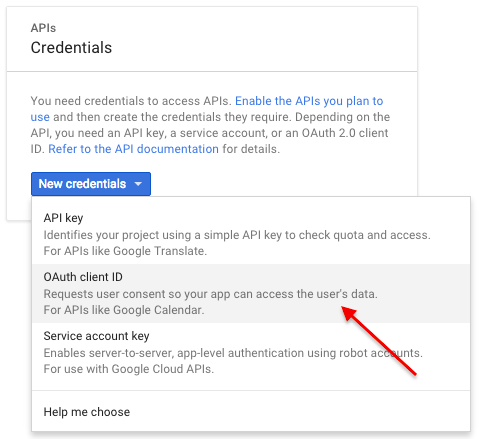
Once the App (Project) has been created, find the "API Manager" section in the Project Dashboard. Select "Credentials" and click to edit your "OAuth consent screen". This is what people will see when your site requests access to their account for the purpose of signing them in automatically. You can tune this in however you like. For now, just enter some of the basics to get a OAuth Consent Screen created, so that you can move on to the next step.
Step 4. Create Client ID for Authentication
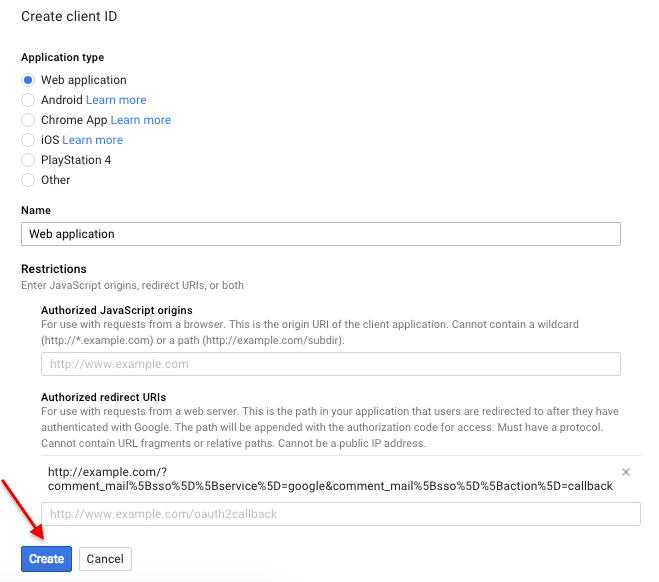
Now we need to create a new Client ID. Find the "API Manager" section in the Project Dashboard. Click to edit "Credentials", and then choose "New Credentials" and "OAuth client ID". You will be asked for a Callback URL, which you can obtain from your Comment Mail™ installation via the WP Dashboard. I'm attaching some screenshots to help you with this part.
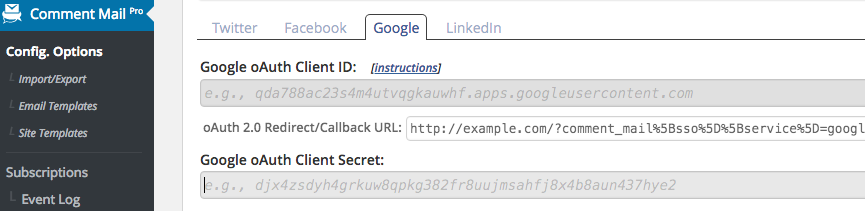
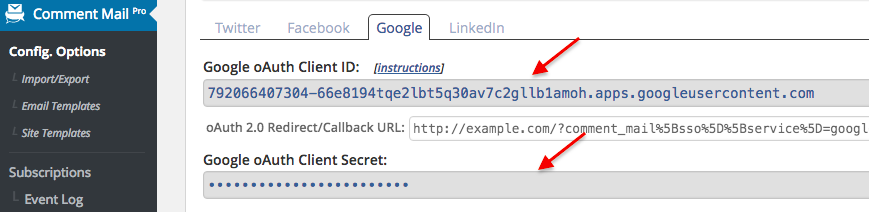
Step 5. Obtain oAuth Key/Secret
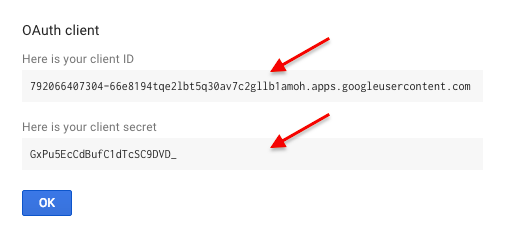
The last step is to obtain your oAuth Key/Secret for the Google App (Project), and give those details to your installation of Comment Mail™. Here are a couple of screenshots to help you with this part.
LinkedIn SSO Integration
Step 1. Visit the LinkedIn Developer Network
See: <https://developer.linkedin.com/>; sign-in or create a new account.
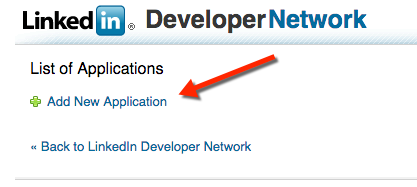
Step 2. Create New Application
Once you're logged-in, click the "Add New Application" link from this page.
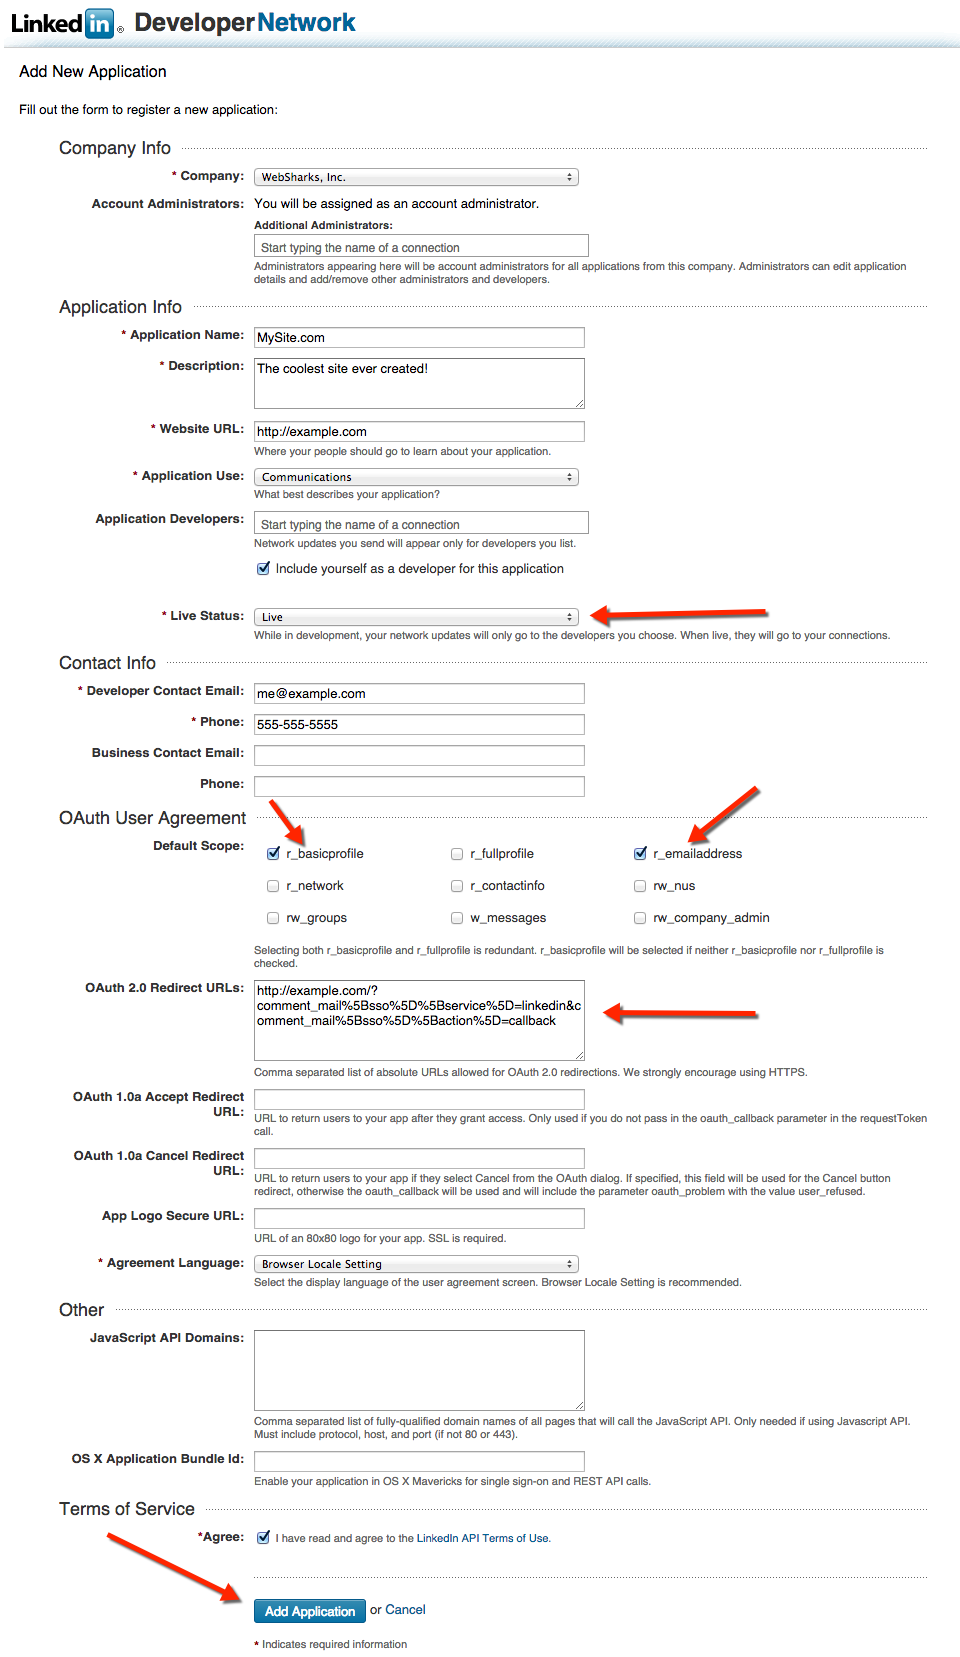
LinkedIn asks for a whole bunch of information when you create a new App. Not all of these fields are required; and in fact, many of them are unnecessary for what we want to do with LinkedIn here.
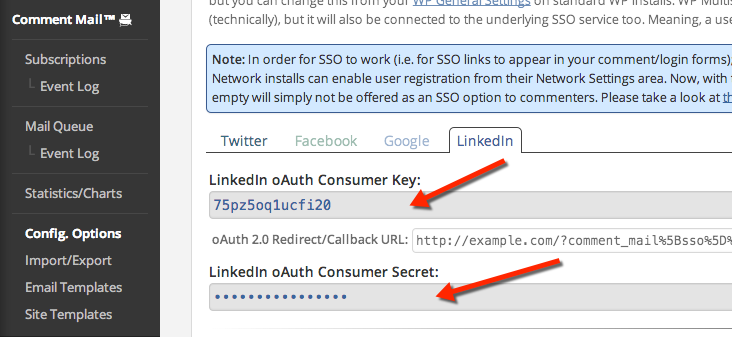
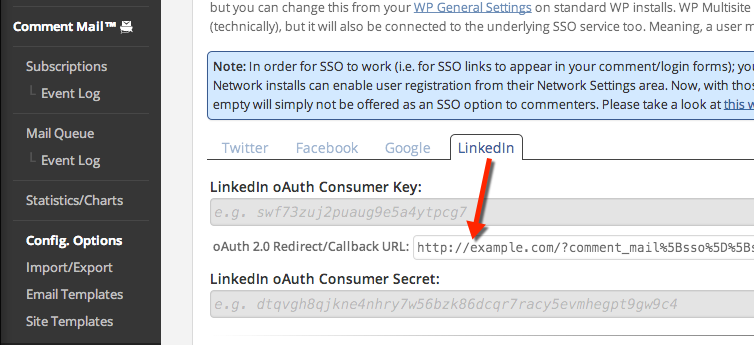
LinkedIn will ask for your oAuth 2.0 Callback URL, so it's a good idea to get this ready. You can find this in your Comment Mail™ options from the WP Dashboard. Here is a screenshot to help you out.
Here is a screenshot of the New App form that has been filled-in already. This should give you some idea of what is necessary and what is not. It's important to check the r_basicprofile and r_emailaddress boxes. These are the permissions that Comment Mail™ needs to log a user in automatically.
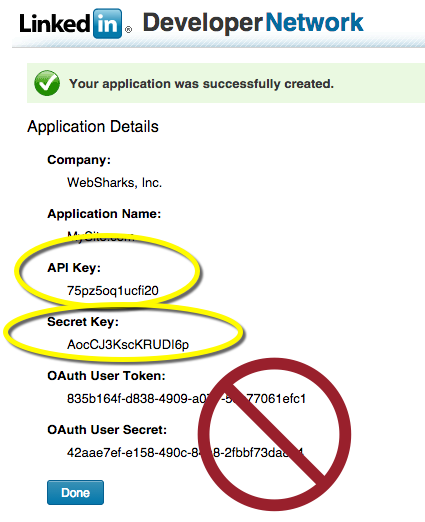
Step 3. Obtain oAuth Key/Secret
Once the App has been created, you will be presented with the following screen. The last step is to take your oAuth Key/Secret for the LinkedIn App you just created, and give those details to your installation of Comment Mail™. Here are a couple of screenshots to help you with this part.
Note: You may find it tempting to copy/paste the wrong Token/Secret from this page. Please be careful about which set of credentials you use. LinkedIn provides both oAuth 1.0a and 2.0 credentials. The set on the bottom is for oAuth version 1.0a. What you need are the v2.0 credentials on top.